What does Kubernetes do?
Service discovery and load balancing: -> K8s can locate containers using a DNS name or IP address and can distribute network traffic to other containers to stabilize deployments.
Storage Orchestration: -> One can automatically mount a storage system of choice, locally or in the cloud.
Automated rollouts and rollbacks: -> One can define the desired state of deployed containers and change the state at a controlled rate.
Automatic bin packing: -> One can provide k8s with a cluster of nodes to run a set of tasks and specify how much CPU and memory each container need. k8s will automatically fit containers on nodes to make the best use of resources.
Self-healing: -> k8s restarts containers that fail, replaces containers, kills containers that dont respond.
Secret and config management: -> k8s lets you store sensitive information such as SSH keys, OAuth tokens and passwords. You can update these without rebuilding your container images and without exposing secrets.
Kubernetes Core Components
Clusters
A Kubernetes cluster consists of a set of worker machines.
Worker machines, called nodes, run containerized applications.
Node Components:
- kubelet -> agent runs on each node in the cluster
- kube-proxy -> network proxy that contains network rules
- container runtime -> responsible for running containers
Pods are the smallest unit of the k8s cluster but in practice, you dont create pods but rather deployments. (see below)
make global descisions about the cluster, such as scheduling. control plane components can be run on any machine on the cluster.
Components of the Control Plane:
- kube-apiserver -> exposes the api
- etcd -> key-value-store for cluster data
- kube-scheduler -> schedule newly created pods
- kube-controller-manager -> run different types of controller processes
- cloud-controller-manager -> lets you link your cluster into your cloud providers api
Kubernetes
Start minikube with 2 nodes:
minikube start --nodes=2then use minikube status to see whats running:
minikube
type: Control Plane
host: Running
kubelet: Running
apiserver: Running
kubeconfig: Configured

minikube-m02
type: Worker
host: Running
kubelet: Running
Using kubectl
kubectl get nodes #To get running Nodes
kubectl get pods -A #To get all pods
Creating a deployment:
kubectl create deployment <NAME> --image=<image>
kubectl create deployment nginx-depl --image=nginx
Now when we run kubectl get deployment:
NAME         READY   UP-TO-DATE   AVAILABLE   AGE
nginx-depl   0/1     1            0           12s
Editing the deployment
Using kubectl edit deployment nginx-depl will show the auto-generated config file:
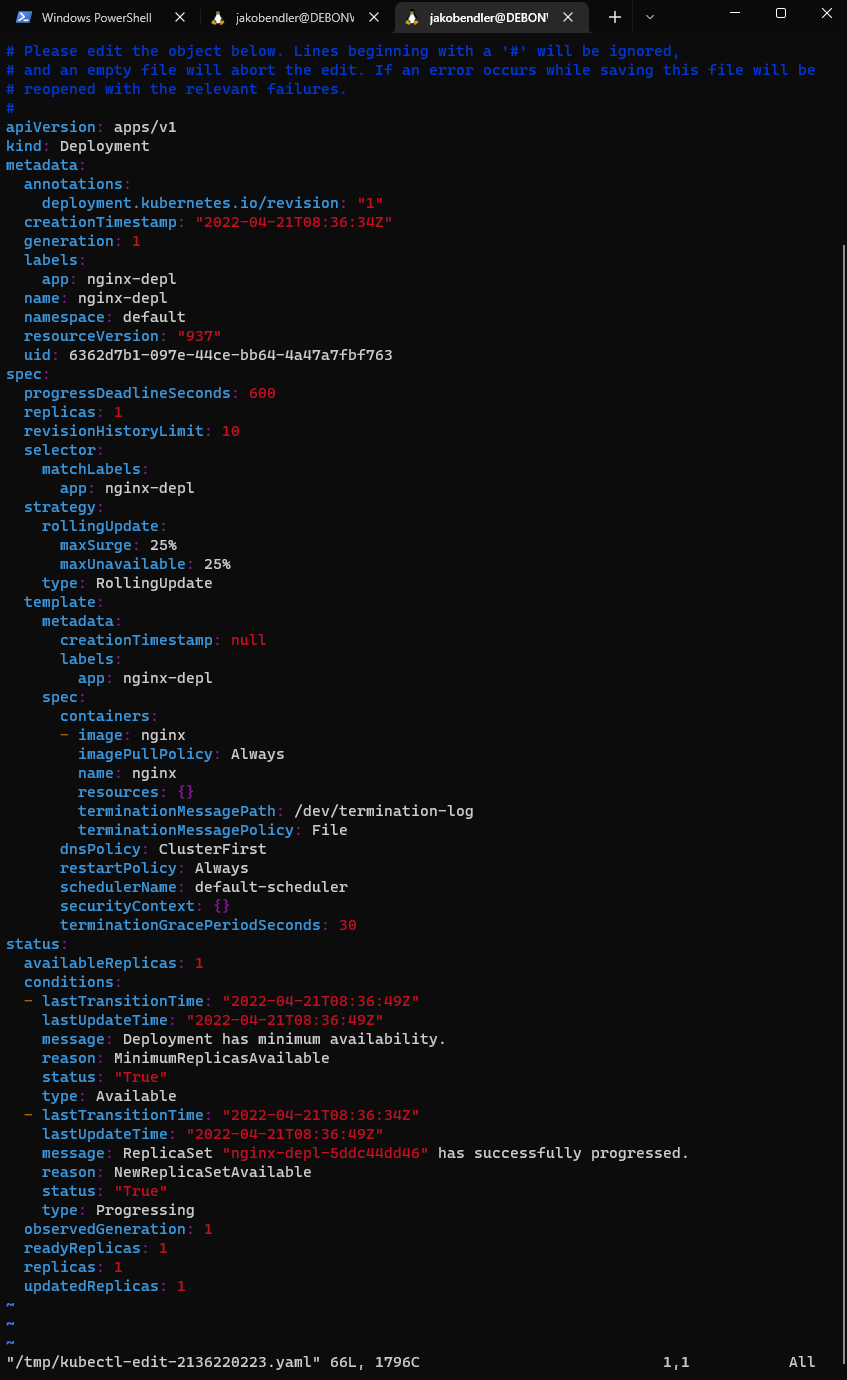
typing :wq will quit this view and apply changes.
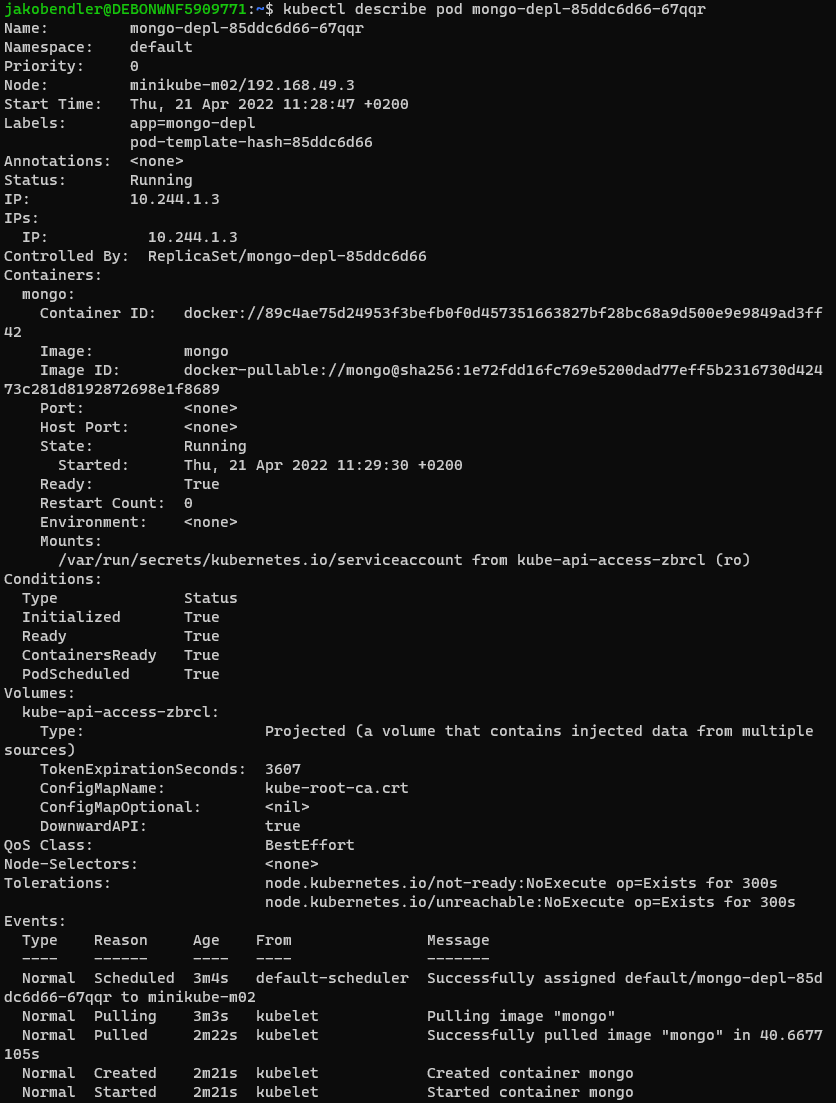
Debugging your Pods
a useful command for debugging is kubectl logs PodName, it produces the logs about whats going on inside the Pod.
Another one to use is kubectl describe pod PodName, which gives more concise information about the pod.
Finally, if one needs a shell inside the Pod use:
kubectl exec -it <PodName> -- bin/bashApply config files
In your Project Folder, create a deployment.yaml
This is an example of a deployment for nginx with 3 pods total:
apiVersion: apps/v1
kind: Deployment
metadata:
  name: nginx-deployment
  labels:
    app: nginx
spec:
  replicas: 3
  selector:
    matchLabels:
      app: nginx
  template:
    metadata:
      labels:
        app: nginx
    spec:
      containers:
      - name: nginx
        image: nginx:1.14.2
        ports:
        - containerPort: 80
After creating the deployment config file, one can apply it like so:
kubectl apply -f nginx-deployment.yamlA bit about Storage
*How do we store data in a system with frequent container restarts?
Depending on the use-case, data can be either stored persistently or ephermal.
The most basic tpye of storage is ephermal. This would be storage inside a normal pod. The data lives as long as the pod is running, and is removed once the pod is down.
There are however multiple ways of storing data in a persistent manner. This includes file, block or object storage services from some cloud provider (such as AWS S3), storage services on-prem, or just regular databases.
Kubernetes provides mechanisms to abstract this storage for applications running on containers, so that applications never communicate directly with storage media.
Volumes are basic entities in Kubernetes, used to provide storage to containers. A volume can support all types of storage. Access to volumes can be achieved directly via pods or through persistens volumes.
Persistent Volumes and Persistent Volume Claims are the two key concepts used to enable persistent storage.
Persistent Volume (PV) is a storage element in a cluster, defined manually by an administrator or dynamically defined by a storage class. A PV has its own lifecycle, seperate from the lifecycle of Kubernetes pods. PVs are configured through the usual yaml configuration:
apiVersion: v1
kind: PersistentVolume
metadata:
  name: pv0005
spec:
  capacity:
   storage: 5Gi
  volumeMode: Filesystem
  accessModes:
   - ReadWriteOnce
  persistentVolumeReclaimPolicy: Recycle
  storageClassName: slow
  mountOptions:
   - hard
   - nfsvers=4.1
  nfs:
   path: /tmp
   server: 172.17.0.2
interesting sidenote: the accessMode “ReadWriteOnce” doesnt refer to the number of read and write operations but rather the number of nodes that can mount this Volume. So in this case, only one node at a time can mount the PV.
Persistent Volume Claims (PVC) is a user’s storage request. An application running on a container can request a certain type of storage. For example, a container can specify the size of storage it needs or the way it needs to access the data (read, write, etc.). They are configured similarly to PVs:
apiVersion: v1
kind: PersistentVolumeClaim
metadata:
  name: pv0004
spec:
  storageClassName: manual
  accessModes:
   - ReadWriteOnce
  resources:
   requests:
    storage: 3Gi
Users can request storage based on custom parameters(HDD/SSD, performance, etc.) without knowing the implementation details of the underlying storage. This is achieved using the StorageClass resource.
One can configure StorageClass and assign PVs to each one. A StorageClass represents one type of storage. For example, one StorageClass may represent fast SSD storage, while another can represent magnetic drives, or remote cloud storage. This allows Kubernetes clusters to configure various types of storage according to workload requirements.
Best practises
When creating a PV, Kubernetes documentation recommends the following:
- Always include PVCs in the container configuration.
- Never include PVs in container configuration—because this will tightly couple a container to a specific volume.
- Always have a default StorageClass, otherwise PVCs that don’t specify a specific class will fail.
- Give StorageClasses meaningful names.
Example: single instance mysql deployment
apiVersion: v1
kind: Service
metadata:
  name: wordpress-mysql
  labels:
    app: wordpress
spec:
  ports:
    - port: 3306
  selector:
    app: wordpress
    tier: mysql
  clusterIP: None
---
apiVersion: v1
kind: PersistentVolumeClaim
metadata:
  name: mysql-pv-claim
  labels:
    app: wordpress
spec:
  accessModes:
    - ReadWriteOnce
  resources:
    requests:
      storage: 20Gi
---
apiVersion: apps/v1
kind: Deployment
metadata:
  name: wordpress-mysql
  labels:
    app: wordpress
spec:
  selector:
    matchLabels:
      app: wordpress
      tier: mysql
  strategy:
    type: Recreate
  template:
    metadata:
      labels:
        app: wordpress
        tier: mysql
    spec:
      containers:
      - image: mysql:5.6
        name: mysql
        env:
        - name: MYSQL_ROOT_PASSWORD
          valueFrom:
            secretKeyRef:
              name: mysql-pass
              key: password
        ports:
        - containerPort: 3306
          name: mysql
        volumeMounts:
        - name: mysql-persistent-storage
          mountPath: /var/lib/mysql
      volumes:
      - name: mysql-persistent-storage
        persistentVolumeClaim:
          claimName: mysql-pv-claim
related: